Yep, I apologies - I seem to have been away for erm... well around 18 months....
Various reason which I won't go into but suffice to say I'm back!
I'll try and get a few posts up regarding bikes etc. - just finished building an awesome bike for my lad - more on that later though.
Stay tuned.
Friday, 6 July 2018
Monday, 30 January 2017
Tonight, we ride!! unless it's cold, my lights aren't charged or I need to feed the cat......
So, night riding then - you either like it or hate it, well most likely hate the faff that goes with it 'cos lets face it a ride is a ride!.
The thing is, riding a trail in the dark gives it a completely different look and feel. That nice wide dead flat trail during the day is now a shadow strewn narrow strip of light bordered by the inky black of night - and what was that in your peripheral vision?? a deer? a werewolf? a fox? or the black eyed girl and Pig Man of Cannock Chase out for a moonlight stroll??? either way it's a different experience.
When I first started night riding I stuck to the nice wide non technical blue route around Cannock Chase and even that took on a whole new atmosphere. There's a section going through the woods at the bottom of Abraham's Valley that always feels just that little bit more closed in with a feeling of being watched.
Even the most boring trail in daylight can be transformed into making you feel like you're piloting the Millennium Falcon at light speed with the windows down! such is the effects of the tunnel vison that can be experienced depending on the lights you have.
When I first started I had single spot light on my bars and a small torch on my helmet - because both of these had a 'spot' beam the cut off from the beam angle was very tight - giving the impression of riding down a very narrow tunnel of light. I tried riding solo once with this set up and ended up ditching the ride after around half a mile as it made me feel sick. If you're in a group of people its not too bad as other parts of the trail are illuminated and it removes the tunnel effect.
My lights are from Amazon and are the Chinese CREE type (similar to THESE) that promise an output of 1200 lumens (they won't - they'll do around 600 - 900 lumens depending on battery type and how good the cooling is and how good the glass in front of it is). These tend to have quite a narrow beam, so to overcome this you can get a diffuser to replace the plain glass at the front. This gives a bit more control to the light and gives it a wider spread - downside is the output drops off a bit due to the light bouncing around a bit to get the right beam pattern.
These are dead easy to fit and it takes about 5 minutes. Below is a before & after shot of the beam patterns.

(Picture taken from C & B Seen Website)
As you can see it takes away the bright centre and gives a more even light level and wider distribution - this now gets rid of a lot of the tunnel effect as the edge of the trail is better illuminated.
I only changed the diffuser on my bar mounted light and left the helmet as spot - this helps to pick out and highlight features ahead of you on the trail where you're looking.
So it's only recently that I've started riding the more technical single track routes at night - this is night riding on a whole new level for me - great fun!.
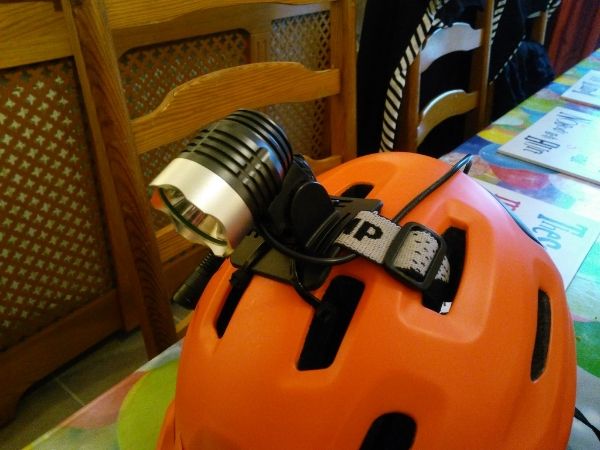
To compensate for this I've put my other CREE lamp onto my helmet - I've kept this as the spot light though without the diffuser. Getting the light to stay in one position involved a bit of engineering know-how (i.e. cable ties, grip tape and rubber matting....). But once they're sorted it makes a massive difference to have a higher output lamp on your noggin'.
As before the trails take on a different air - what appeared to be small drop offs in daylight look a lot more ominous by torch light. You have to be a bit more careful with the lines you choose as it's hard to judge rock heights, rut depths and what ever else is lurking in the shadows. It's also good for getting you to look further down the trail. If you look just in front of your bike that's where all the light is concentrated and you end up just barrelling into the dark unknown.
Setting your lights to the perfect angle can be time consuming making sure that you aim the spot far enough in front at the right angle to keep your head level. You also have to remember that where you look is where the light will be.
I've also upgraded/replaced the original battery packs that came with the lights. I did this for 2 reasons:
- They weren't holding a charge very well
- I'd seen some posts about them exploding/catching fire as not all of them have built in protection circuits to prevent over charging - I used to charge mine at work so they weren't left unsupervised.
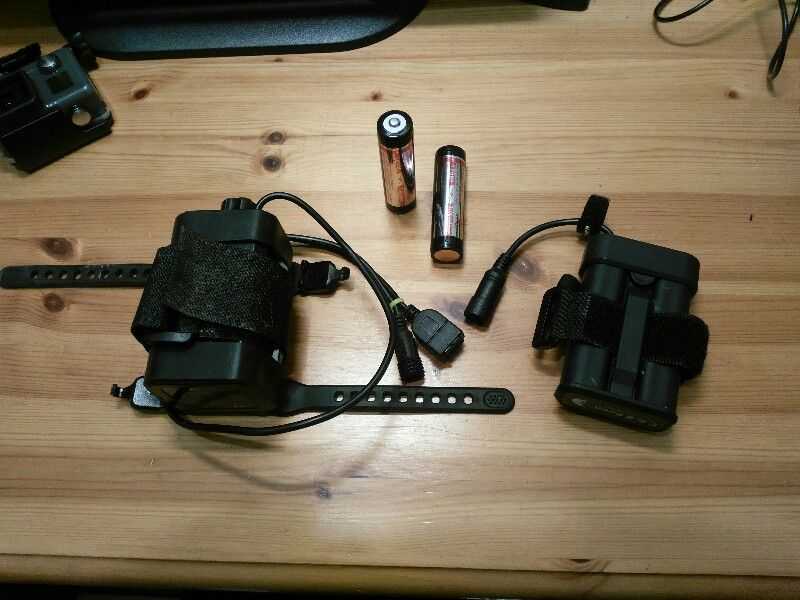
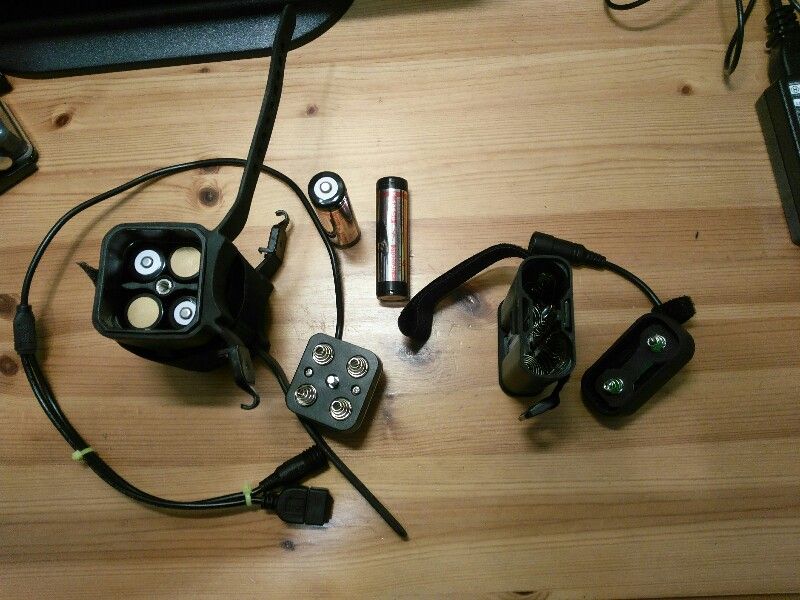
I picked the 2 cells and holder up from C & B Seen (incidentally I also got my diffuser lenses from them previously), the 4 cells from Amazon and the holder from GearBest. The 4 cell holder also has a USB output so you can charge your phone or Garmin if needed too.
The 2 cell holder has the two 3.7V 3100mAh batteries in parallel to give a the required 7.4V output and keeps the capacity to 3100mAh - so should be good for 2.5 hours on full.
The 4 cell holder uses a series/parallel arrangement of 4 2600mAh cells to give the 7.4V output but doubles the capacity to 5200mAh, which apparently is good for around 3.5 hours on full.
I will, at some point do a proper burn-time test on the lights and batteries.
So with decent batteries and sturdy mounts it's all go!
knowing that your lights are going to last for at least a good couple of hours on max and longer on low setting is nice and comforting,
It's easy to switch between hi/low settings (even with the helmet mounted light) and I use the low settings for fire roads and roads and switch to hi for the twisty technical stuff, this seems to work OK and will also make the batteries last longer as you aren't running them flat out all the time.
You can also see a surprising amount of wildlife at night too. I've encountered bats, owls, deer - both singular and in a herd and the ever present 'trail mouse' which always seems to appear when you're lent over going through a corner with little room to avoid the damn thing*!
My first night ride of 2017 culminated in me sharing the final climb back to the car with a herd of deer - it was a privilege to just stop where I was and watch them as they went about there business, they didn't seem too phased by it at all.
Other things to consider are clothing choices - it's better to get layered up in the winter months base layer under jersey, fleece/waterproof over the top and leggings under your shorts; oh and get some warm socks - it's not fun when you can't feel your toes 10 minutes in to the ride...
Getting back into night riding - even with all the 'faff' has given me a renewed enthusiasm for riding again.
So what are you waiting for? Get some lights and get riding!
*No trail mice were injured in the writing of this blog - the rider, however, has narrowly avoided several 'offs' avoiding said rodent.....
Thursday, 26 January 2017
Got a head? Get a helmet!
So it was new helmet time a while back as my trusty Fox Flux was a few years old and needed replacing.
So I narrowed my choice down to 2 possibles in the non scientific way of I liked the look of them and the price was around what I wanted to pay. These potential new lids were the 7iDP M2 and the On-One 'Enduro'.


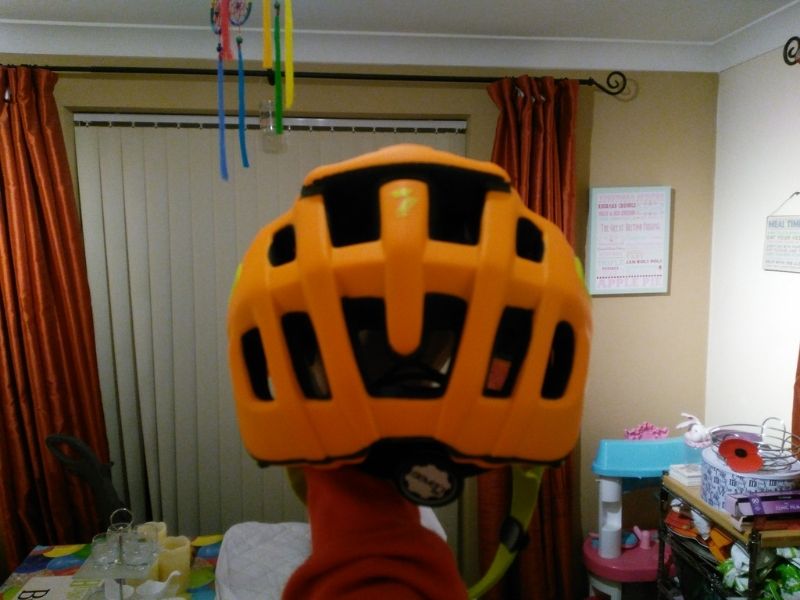
I'd tried the 7iDP M2 in Swinnerton Cycles and and it felt pretty comfortable and provided a good degree of rear protection in the new 'enduro stylee'.
The On-One was a bit of an unknown, but Planet-X/On-One where knocking the helmet, beanie hat and headover/buff type thing for £25 - the helmet is usually £49.99 (allegedely) but was reduced to £34.99 unless you applied the 'bundle' with the hat & stuff - no brainer I'll take a bobble hat too thanks!!
Here's what On-One/Planet-X have to say about it:
On-One 'Enduro'
Extended rear coverage
Durable, seamless, single-shot, in-mould construction
3-Way, height, tilt and circumference adjustment
Removable, anti-bacterial comfort pads and fly mesh
18 air vents and a carefully sculpted front visor that directs airflow through the front of the helmet
Built with greater coverage and more side protection than our lighter XC helmet the On-One Enduro helmet is perfect for the serious off-road rider who lives for the downhills
It's got a decent adjusting mechanism at the back with the wheel/rotaty adjuster and the straps are pretty comfy too - if not a bit long.
So I planned to either send the whole lot back or sell the helmet on for £15 - £20.
So the 7iDP M2 then was to be the weapon of choice as it had felt super nice in the shop - I have to admit to not purchasing from Swinno's as CRC had the same hemlet for £20 less.....
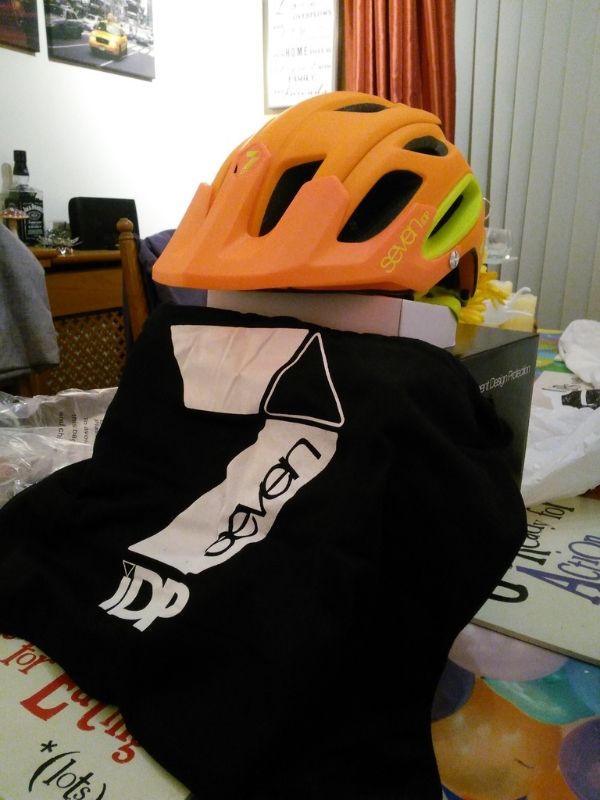
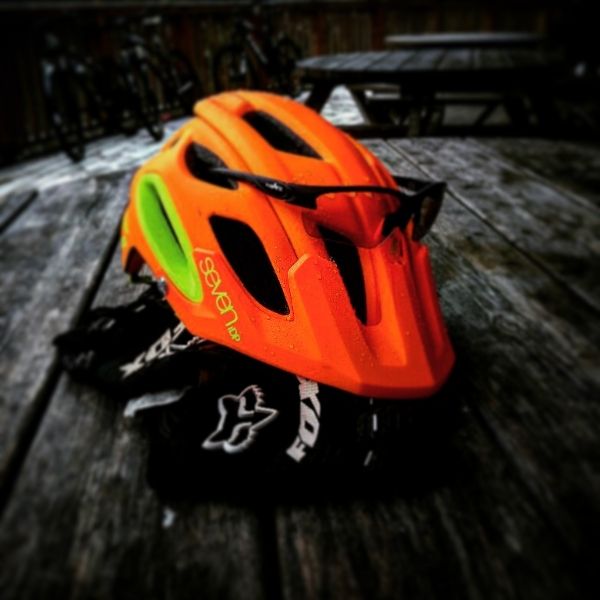
So using the free delivery service I had a bright (very, very bright actually...) matt neon orange with yellow highlights M2 on my desk at work within a couple of days.
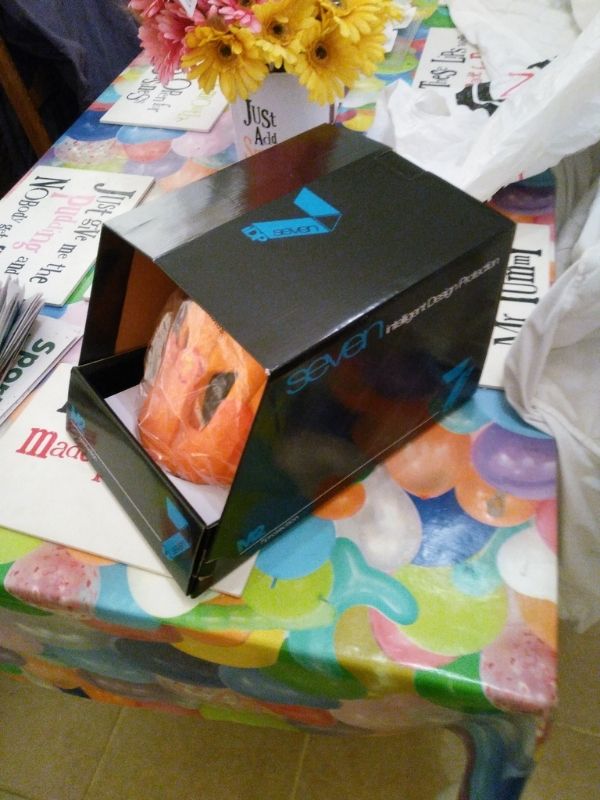
In the box you get a nice drawstring bag to keep you helmet safe (or possibly out of sight so planes don't think it's a distress flare....)
 Here's a quick rundown of the features as listed on the interweb:
The M2 Helmet is a welcome addition to the range of body protection. The custom 7iDP design liner offers superior comfort and fit, giving you the confidence to take on the trails.
Here's a quick rundown of the features as listed on the interweb:
The M2 Helmet is a welcome addition to the range of body protection. The custom 7iDP design liner offers superior comfort and fit, giving you the confidence to take on the trails.
Open face all mountain design
ConeHead™ technology uses dual density foams which act as an impact absorbency zone around the head
Great coverage compared to standard XC designs
19 vents
Custom 7iDP design liner for superior comfort and fit
Adjustable visor
One hand dial fit 'on the fly' adjustment
Rapid adjust chin/cheek strap
CE std: EN1078
So that's the end of the post then - the 7iDP is the helmet I wear then? - well not exactly....
You know I said I was goinf to send the On-One back or sell it? Well neither of those happened (I forgot - oopps!).
It's always good to have a backup helmet right?
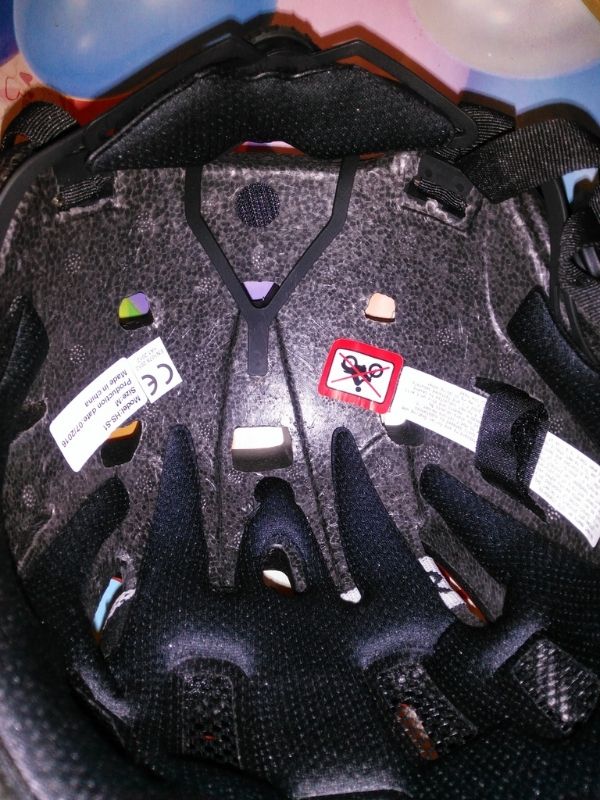
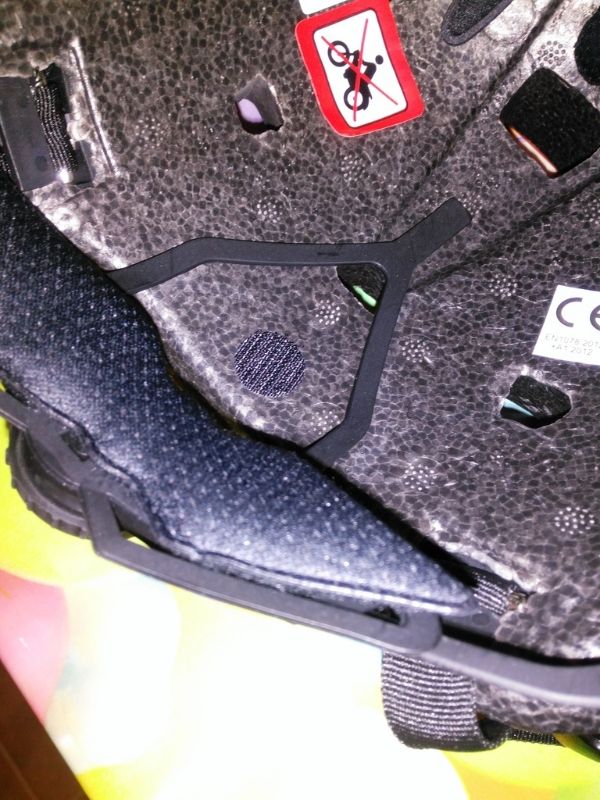
So I looked at the On-One and got the spare unused pad set from my Fox Flux to see if I could make it comfortable. One fox pad and a bit of sticky velcro later and the helmet felt half comfortable. A bit more tweeking and repositioning and one comfortable decent fitting helet - Bonus! Why On-One/Planet-X didn't include the extra 50p pad and velcro is beyond me - turns it into a useable helmet.
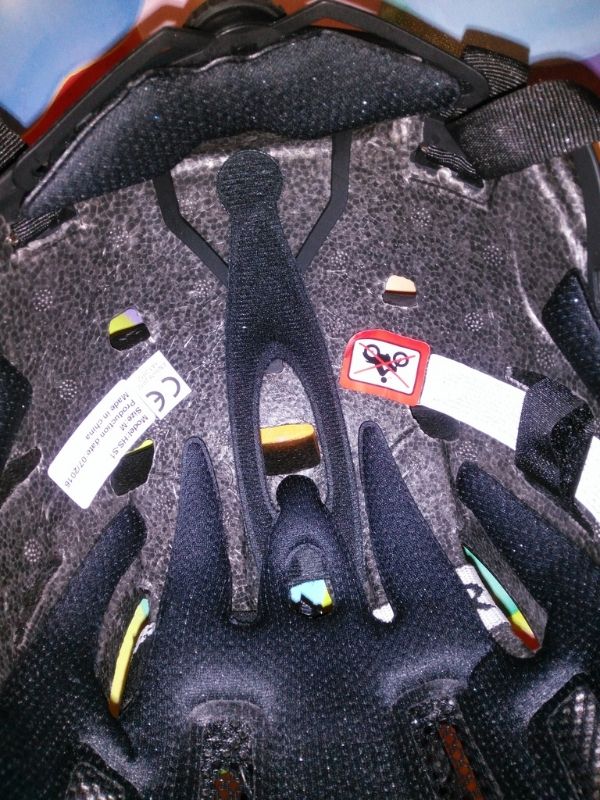
So I was looking to attach my helmet light to the M2 so I could go and do some night rides - this was proving difficult with the bracket and helmet combo and I couldn't get a good fit/solution. So i broke out the On-One and some cable ties and hey presto one helmet with a good solid mount for a light.

Both helmets have beenused a coupleof times and have been comfortable with and without a bandana/thin hat underneath.
The M2's shell looks a bit bigger than the On-One and definatley gets more comments due to the day-glo colour.

I took both helmets to Coed Y Brenin for a weekend and wore the On-One all day Saturday in case we stayed late and needed to break out the lights - was nice and comfortable for the entire day. The M2 was worn for most of Sunday and again, nice comfortable and kept my head warm during the cold weather and snow.
I will be interested to see how both of these perform in the warmer weather with regard to ventilation etc. I'll hopefully update this later in the year when I've had more experience of both.
So in conclusion these are both decent helmets - the M2 edges it on quality and comfort, but with a bit of padding and some velcro the On-One goes from unwearable to comfortable budget friendly helmet.
So I narrowed my choice down to 2 possibles in the non scientific way of I liked the look of them and the price was around what I wanted to pay. These potential new lids were the 7iDP M2 and the On-One 'Enduro'.


I'd tried the 7iDP M2 in Swinnerton Cycles and and it felt pretty comfortable and provided a good degree of rear protection in the new 'enduro stylee'.
The On-One was a bit of an unknown, but Planet-X/On-One where knocking the helmet, beanie hat and headover/buff type thing for £25 - the helmet is usually £49.99 (allegedely) but was reduced to £34.99 unless you applied the 'bundle' with the hat & stuff - no brainer I'll take a bobble hat too thanks!!
Here's what On-One/Planet-X have to say about it:
On-One 'Enduro'
Extended rear coverage
The helmet arrived fairly qucikly for On-One/Planet-X (considering the tyres I ordered in the summer took nearly a week and a half to arrive....). I was quite excited to see how well this 'budget' option stacked up against it's more costly competitor. Looks wise it's a pretty spot on looking helmet - plenty of coverage and a decent amount of vents and the orange colour isn't too in your face.
Well that was where the good points ended - it wasn't the most comfortable, and seemed to press quite a bit on the back of the head. Strangley there is part of the cradle that doesn't have any padding on it - and this was the bit that was uncomfortable. A quick google suggested that other people had similar issues and it seems to have just not been thought about - pity as it's a good helmet for the price - and I really liked the beanie hat and head-over.
So I planned to either send the whole lot back or sell the helmet on for £15 - £20.
In the box you get a nice drawstring bag to keep you helmet safe (or possibly out of sight so planes don't think it's a distress flare....)
7 iDP M2 Helmet
Open face all mountain design
So pretty impressive (and bright...) - the helmet just works, the padding is spot on and the rotary adjuster mechanism is nice and easy to use and the adjustable peak is a nice touch - although top tip - don't undo the peak adjuster too much as it's a bugger to get back on....
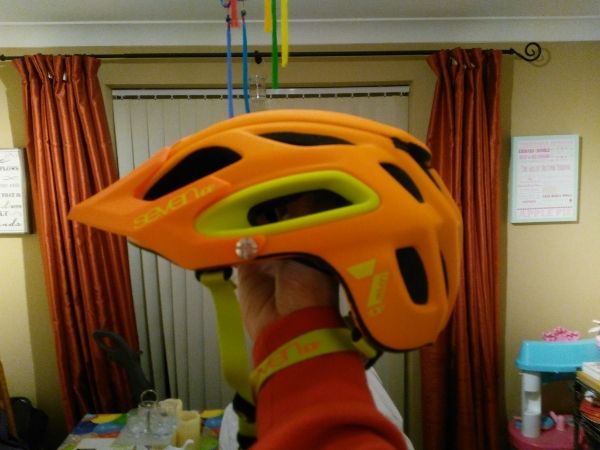

Once the straps are all adjusted and it's a nice fit - provides good coverage and appears to be well vented.So that's the end of the post then - the 7iDP is the helmet I wear then? - well not exactly....
You know I said I was goinf to send the On-One back or sell it? Well neither of those happened (I forgot - oopps!).
It's always good to have a backup helmet right?
So I looked at the On-One and got the spare unused pad set from my Fox Flux to see if I could make it comfortable. One fox pad and a bit of sticky velcro later and the helmet felt half comfortable. A bit more tweeking and repositioning and one comfortable decent fitting helet - Bonus! Why On-One/Planet-X didn't include the extra 50p pad and velcro is beyond me - turns it into a useable helmet.
So I was looking to attach my helmet light to the M2 so I could go and do some night rides - this was proving difficult with the bracket and helmet combo and I couldn't get a good fit/solution. So i broke out the On-One and some cable ties and hey presto one helmet with a good solid mount for a light.
Both helmets have beenused a coupleof times and have been comfortable with and without a bandana/thin hat underneath.
The M2's shell looks a bit bigger than the On-One and definatley gets more comments due to the day-glo colour.
I took both helmets to Coed Y Brenin for a weekend and wore the On-One all day Saturday in case we stayed late and needed to break out the lights - was nice and comfortable for the entire day. The M2 was worn for most of Sunday and again, nice comfortable and kept my head warm during the cold weather and snow.
I will be interested to see how both of these perform in the warmer weather with regard to ventilation etc. I'll hopefully update this later in the year when I've had more experience of both.
Wednesday, 25 January 2017
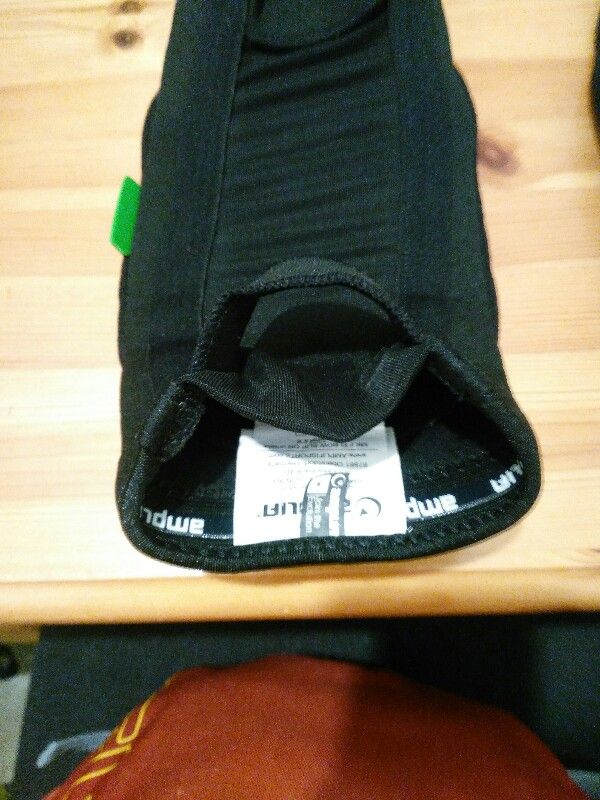
Review: Amplifi MKII knee & elbow pads
Right then, time for a review - I picked these rather fetching green/black Amplifi MKII pads up in the TREDZ sale and paid the princely sum of £40.98p delivered for the knee and elbow variety with a £5.00 off code.
As you can see from this image they come in two flavours - slip-on and strap-on (oh hang on - that doesn't sound quite right does it.....)
As you can see from this image they come in two flavours - slip-on and strap-on (oh hang on - that doesn't sound quite right does it.....)

Now Amplifi aren't a brand I'm familiar with, but I was looking for something less bulky than my 661 Rage pads (which are also a tiny bit on the big side and don't quite sit properly - but they're not uncomfortable) and didn't cost a fortune, and they seem to be pretty big in ski protection and my mate who's a ski instructor said that it's decent stuff - so in for a penny, in for £40.98.....
They've got some clever Armourgel in the pads which makes them flexible until you fall off and inevitably have to test them out - I don't really understand the science behind it but this video of the clever stuff does and it has some bikes in it too:
And here's some info from the website:
The MKII series fuses next level material tech with super functional cutting edge design. Now, Amplifi are stepping up the game for protective gear in 2014, taking a material developed by British scientists for military grade body armour - and injecting it into our latest range of protectors. We’ve designed every piece to take full advantage of these properties, working with engineers, riders and testers worldwide, to create the ultimate in comfort AND protection.
Features:
Custom fit design through slip on design in combination with ultra flexible MK II protector
EN 1621-1:2012 – Level 2
Super low profile design
Kevlar fabric over protector area for extra abrasion resistance
Silicone in hems for no-slip grip
The Science
Armourgel uses a combination of an innovative geometric cavity design and an active smart material to deliver a comfort to protection ratio never before seen in the industry. This truly is next level s**t.
The material is strain rate sensitive - Think of it as an extra layer of muscle, working with your body to create an active layer of protection for your body. It intelligently adapts its level of shock absorption relative to the amount of impact. When riding, it flows with your body moving with you, and allowing you full freedom of movement - under impact the material reacts, and increases its absorption properties. The smart material is used in tandem with a geometric cavity design to double dose the safety factor. The unique S-Cell design builds density exactly where it is required, when it is required.
This is proprietary to Armourgel, and cannot be found on any other material. The result is a super-lightweight, incredibly flexible material that moves with you when shred, and adapts itself instantaneously to protect you when you slam. You can get yourself up, get the snow out of your goggles, find where you lost your gloves - and finish the day in style.
I like it when they use words like 'Kevlar', 'Military grade' and 'next level' - makes them sound cool!
So the pads arrived quite quickly from Tredz even using the standard free delivery service - brilliant.

I was suprised at how light they are - OK they're not trailskin light but still lighter than my previous pads.
I'd looked at the sizing chart and decided to go for the Small in both knee and elbow as I have weedy arms and pipecleaner legs (just about managing to hold on to the 'runners leg' physique - pity the rest of me isn't.......)
I tried them on and they were a bit tight to get on first time but were actually quite comfy.
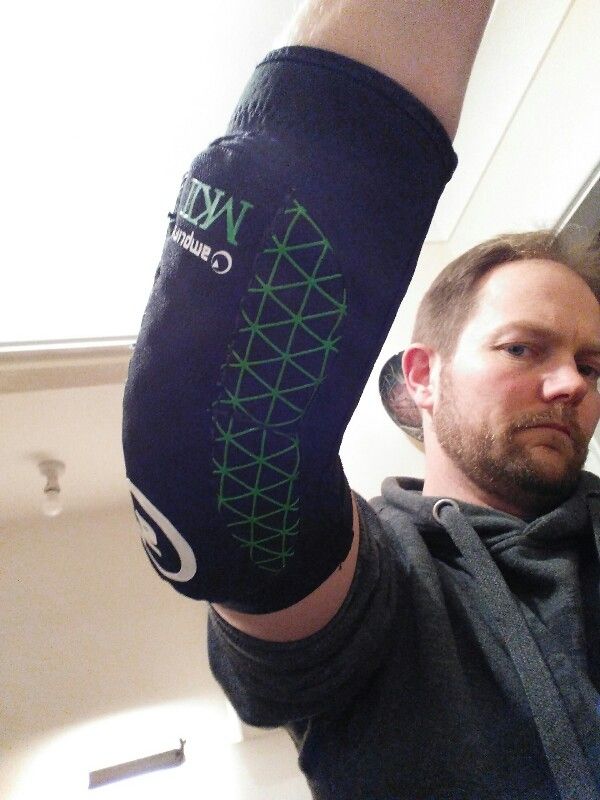
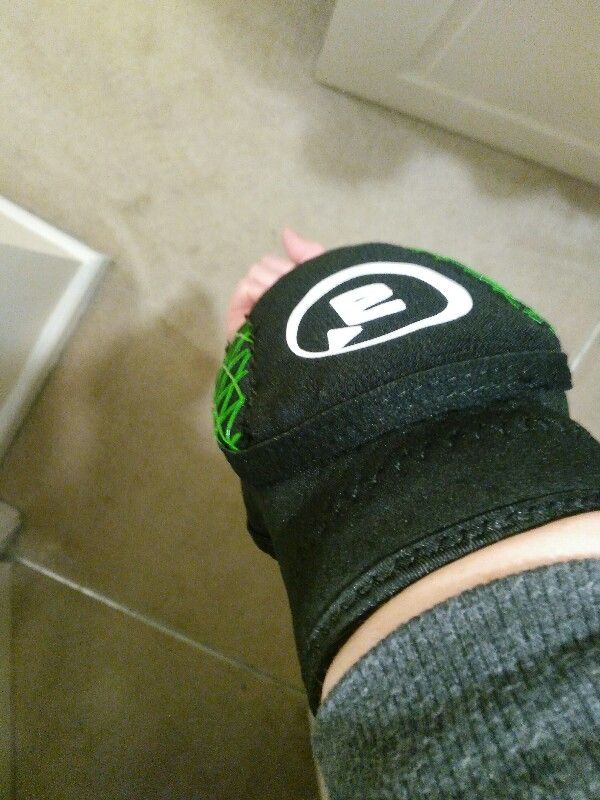
They've got a little silicone strip top and bottom to stop it slipping - which also means it tries to pull
your skin off when you try and move them!
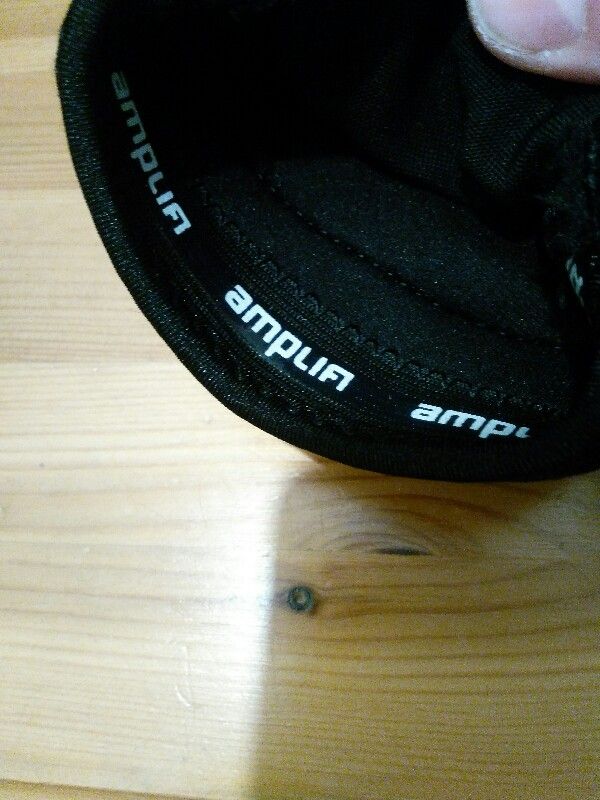
Around the back they're a full 'sleeve' with elastic top and bottom.
So after trying them on I did the only sensible thing and put them in my bag ready for a weekend away at Coed-Y-Brenin.......
So on to the test! I arrived at CYB around 10:00 on Saturday morning after driving through freezing fog (a balmy -9 deg C at one point - Even the Sheep were cold!) and ice to be greeted by glorious Snowdonian sunshine - it was still cold though, so I decided that some sort of tights would be an idea under my shorts. Luckily the pads still fitted over the top -Result!
So Saturday I did around 30km of riding and the pads were super comfy - I didn't manage to checkout there protection prowess, but I did ride around a mile & half back to the digs on the road and they didn't cause any issue with continual pedalling either - bonus!
Sunday dawned and with it came the snow..... so it was back on with the tights and pads over the top again. After an hour or so the left pad was starting to irritate the back of my knee - this was down to my tights having a slight crease in them more than the pad being the issue. A bit of fiddling & faffing later all sorted and back to not realising you're wearing them. Again I didn't get to checkout the 4D armour gel in action but the fact they're comfortable and light weight they should be OK in most conditions.
Anything I'd change? Well with them being minimalist type pads there's very little protection on the side of the knee, but that's to be expected I suppose.
So far, so good - will see how they stand up to regular riding around Cannock and I'm sure at some point I'll get to experience the science behind the armour gel.....
Thursday, 29 September 2016
I got skills - they're multiplying....
So you got skills right?
It's riding a bike - how hard can it be??
I've read a book, watched YouTube and now I'm a combination of the two Danny's - Hart & MacAskill......
It's riding a bike - how hard can it be??
I've read a book, watched YouTube and now I'm a combination of the two Danny's - Hart & MacAskill......

Would be good wouldn't it?
Now I'm no trail god but I can ride a bike (i.e. stay upright and start/stop and not fall over.....much) but going on a skills course seemed like a no-brainer to me. I wanted to be able to ride better and feel more confident - and being armed with the correct techniques can't be a bad thing can it?
I've done two skills courses over the last couple of years with CHASE SKILLS (other providers are available) and have learnt a lot and had fun (and cake....) along the way
The first course I did was the 'Skills & Thrills' course which covers the basics and is a lot of fun!
I did this back in October 2014 and there were 6 of us on the course.
Our instructor for the day was Alex - who as well as being owner of Chase Skills is also a top bloke (he also likes cake...).
We met at Run & Ride in Hednesford and started off with the group riding in a coned area trying to avoid each other and not put a foot down. The area within the cones was gradually reduced and if you 'dabbed' you were out. So what's the point of this? balance and slow speed control - which are pretty essential for techy single track riding.
We had a look at bike set up including bar and saddle height/position and made a few changes which made riding positions better (mine was waaaay off!!).
We then hit the trails with Alex leading but also dropping back to have a look at our riding positions and general bike handling skills.
I think his comment about my riding style was along the lines of 'just holding on and ploughing over everything' - so not much skill or finesse then.....
So back to basics it was for all of us. We covered the attack position, gear selection, climbing techniques and riding down steep slopes. All the time Alex would enlist a member of the group to help out and pass comment on how they thought the others were doing and spotting any mistakes in a 'good cop - bad cop' kind of way - this works well.
All the time we were practicing the mantra 'light hands heavy feet' - this helps the bike to move around under you and keep your weight & centre of gravity lower and means you aren't holding on for grim death and being flung into the nearest ditch. The bike works for you!

All the time we were practicing the mantra 'light hands heavy feet' - this helps the bike to move around under you and keep your weight & centre of gravity lower and means you aren't holding on for grim death and being flung into the nearest ditch. The bike works for you!
After this went for for a short ride to practice what we'd learnt and ended up at the cafe as it was cake time......
After cake and a chat it was on to manuals, bunny hops and cornering.

This was where I realised that a dropper post was awesome and wished I had one. In fact I wished I had a seat post as Alex confiscated mine as I wasn't getting out of the saddle enough and leaning the bike over - its amazing how much no saddle focuses the mind......
So after much 'Wayne's World' style hip schwing-ing (showing my age here.....) and bouncing on the pedals to prove that tyres will grip when lent over it was time to hit the trails once again.
The route back incorporated a decent stretch of the 'Follow the dog' trail, including the 'High Voltage' and 'Zik-Zak' sections. These include a bit of everything and put in to practice what we'd learnt throughout the day.
I was feeling pretty pleased with my progress until the log roll drop off at the end of Zik-Zak (which sadly is no longer a feature on the trail) where I promptly forgot most of the techniques Alex had shown us and I went OTB (Over The Bars) and face planted at the bottom of the drop with my bike on top of me..... Luckily I wasn't alone and was quickly joined face down by one other person. I took away from this that being in the correct gear and having the appropriate speed are essential to staying on the bike.....
So after picking ourselves up and watching the rest of the group nail the drop it was a spin back to Run and Ride for a debrief and a cuppa (and some more cake....).
Overall a great day and meant that I had a lot more control of the bike and an idea of what I was doing when riding the trails!
The second course I did with Chase-Skills and Alex was the half day Jumps and Drops course. This was done in June 2015 - and I didn't have the best preparation for it.........
In September 2013 I had a minor mishap and fell over damaging my shoulder - this was actually worse than I thought and kept giving me problems over the course of the 18 months which resulted in cortisone injections and physio and the possibility of surgery... I'd had one round of injections in September 2014 but by February of 2015 I was back to constant pain. I got referred to a brilliant Consultant who stepped up the physio and discussed surgery. I had a second round of injections 3 days before I was due to undertake the course with Alex.

No problem I thought - the last lot didn't give me any problems and I'll be fine. Oh how wrong I was! by the first evening I was in agony and couldn't feel my hand or lift my arm above my waist - not conducive with riding a bike let alone getting some air! Luckily the effects wore off (slightly....) and by the Sunday morning I could lift my arm to shoulder height and feel my hand again but was still grip and strength limited and still felt like I'd been repeatedly punched in the shoulder for weeks. So I took a dose of MTFU (also know as paracetamol & codeine) and headed up to Run & Ride to meet with Alex and the other course members.
The day started with tea and biscuits and a general chat and catch up and introductions. There were five of us on the course so a nice small number. Before we headed off one of the lads, Scott, asked if I wanted to give my forks a quick spray with some fork juice (again - other brands are available....) I politely declined - which later turned out to be a bad move.....
So we jumped on the bikes and headed out across the 'Chase via some lovely trails to the 'Bomb Hole' just by Takeroo camp site. This should have been a fun ride but I had a bit of a nightmare on this - I just couldn't get into a flow - I was all over the place and kept going of the track and struggled to keep up. I thought it was partly down to my shoulder/hand issue and generally feeling slightly off. It turned out that I'd got my forks locked out and was riding a rigid! If I'd taken Scott up on the offer of a 'lube' I'd have spotted this and not felt so crap when we got to Takeroo.
So first thing we covered was manuals and why you should push and not pull the bike when doing it and Alex had us popping over roots and stumps to practice. Alex again employed the 'good-cop bad cop routine' with getting us to critique each other.
We then went on to 'pumping the trail' - this was a major revelation to me. I'd watched Aaron Gwin's 'chainless win' at the Down Hill World Cup not that long back and wondered how he'd done it.
Pumping is awesome - allows you to pickup and carry speed through various features of the trail just by making the trail work for you - no pedalling!
This culminated in a friendly pumping competition - a line was drawn where we could pedal up to (gave you about two pedal strokes!) from there on it was pump the terrain and see how far you get. It's actually pretty impressive how far you can carry yourself with this technique.
We then went on to get some air! This was combining the pumping and manual to 'pop' the bike of an obstacle - which in this case was a small angled stump. I may have got carried away with this and taken a bit too much speed on the first go which resulted in what felt like a long time on the air - Alex looked impressed anyway.....
So after this we went on to some bigger drops which I was getting quite confident with and contemplating the biggest step when Scott went OTB and required a bit of patching up - my enthusiasm was somewhat tempered with this reminder and the lack of grip in my hand!
Once Scott was patched up we hit the trails and headed out to the small quarry over by 'Cadet Corner' - where handily someone has built a table-top jump! the ride over was much more pleasant now that my forks were working as they should!
Much fun was had on this section with learning how to pump the up slope of the jump and getting the correct body and bike position for the landing.
This was great fun and trying to get the perfect take-off and landing became a bit of a competition. I think I managed one really good combination of the two.
We then headed back to Run & Ride at Hednesford for a debrief (and tea and biscuits...) via a few more trails I hadn't previously ridden.
A great way to spend a morning and thanks again to Alex for his patience and enthusiasm.
So whether you're a novice or an experienced rider there's always something to learn and it's always good to get someone to look at your technique and give feedback.
I will be doing more skills courses in the future - I might even revisit the Jumps & Drops and see how I get on with two working hands and shoulders!!
Thanks for reading!
Wednesday, 21 September 2016
My MTB journey...
Sorry for the delay in putting up a post - work and other stuff keeps getting in the way!
So, my bikes then........
I suppose I should put up a picture of my first mountain bike - although it's probably closer to a BSO (Bicycle Shaped Object) than an MTB.
This was a Saracen Element 2 that I purchased in 2009 and was in fact the first bike I'd had since my Raleigh Super Burner BMX when I was 11......

Getting 'back on a bike' came about due to a running related knee/calf injury I picked up on New Years Eve 2008. I had intensive physio and was told not to run - but cycling would be OK. So I went and got a bike. I got the Saracen based on my previous experience of them (which was back in the early 90's when I worked at Halfords as apart time bike sales assistant/repair butcher...) and I had a thing for the Saracen Tuff Trax Elite which was a £500 bike at the time and had Shimano Deore LX kit - sexy!!
So fast forward 20 year and I walk into a shop see the Saracen and go into Andy Pipkin mode - I pointed and said 'I want that one....'
It was a beast (OK, not quite....) it had the following awesome spec:
*SR Suntour XCT-V2 suspension forks with 75mm travel
*Lightweight & profiled 7005 T6 aluminium frame
*Shimano Altus 24 speed gear system with trigger shifters
*XC-D double wall alloy rims with alloy quick release hubs
*SR Suntour alloy chainset fitted to a sealed cartridge B/B
But it did one thing - got me back out exercising and back on a bike for the first time in over 20 years! I stuck with the riding until my injury was sorted and then it went back in the garage and I went running again! It came out a few other times later that year for a ride round some lanes with a mate.
Then fate threw the worlds worst (well from my point of view anyway....) kidney infection at me early 2010 (which may or may not have been linked to running around Dubai for 5 Months of an evening training for the London Marathon where they spray 'untreated water' on to the grass of an evening....). Suffice to say I didn't do the London Marathon in 2010, as I spent 2 months on antibiotics feeling quite rubbish. So how does this relate to MTB's? - well, i also used to dive a lot at the time, which I also couldn't do with dodgy kidneys, and my instructor was a keen Mountain Biker at the time too - so he suggested that I join him for a ride over Cannock Chase one morning for a lap of Follow The Dog. I have to say it was the most fun I'd had on a bike since I was 12 jumping of the school steps or riding the local BMX track.
Anyway, I didn't get much riding over The Chase after that due to the arrival of our Daughter late 2010 and a house move in late 2011 - to Cannock......
Cannock Chase is awesome - not just for riding, but for general outdoorsy stuff! - but don't just hang around the visitors centre at Marquis Drive (like 90% of the population of Cannock) - there's way more to explore and enjoy!
It wasn't until early 2014 that I dug the bike out again and started riding as it was about this time my Daughter started riding a bike and my Son got his confidence back.
It started as a ride around the visitor centre paths and then I'd go off and explore a bit while the kids hit the playground, I'd also do a couple of little rides locally on Shoal Hill Common.
I also joined a local group called Chase Riders and tagged along on one of there evening rides. This is when I realised that I liked MTB - a lot! And I also realised after a couple of rides with these guys that my Saracen just didn't cut it.
I wasn't sure if I could upgrade the Saracen or get a new bike, so I started doing a bit of research and after reading a couple of reviews and consulting a few forums I settled on a new bike instead of upgrading the Saracen as it would work out cheaper.
So I ended up with a Carrera Fury - this was the 26" wheel 2012 model and was being phased out to be replace with the new 650b wheel version. So with some British Cycling discount, online discount code and some cash-back I got it for around half price - bargain!
This was a major step up from the Saracen as it had 120mm travel air forks, trendy 2x10 SRAM gearing and hydraulic disk brakes.

This bike was head and shoulders above the Saracen and was more confidence inspiring. It's been all over the Chase, The Peak District, Long Mynd and the Wrekin - and has handled them all brilliantly.
I've made a few upgrades over time - which I'll cover in another post about each of the bikes.
So the Fury has served me well for over 2 years, but I found myself wanting a bit more travel and a bit of rear suspension.
Last year I built my Son a new bike instead of buying something from the shop as I could build a better spec for less with decent used parts (will also do a post on this at some point!). I quite enjoyed doing the build and decided to have a go at building a Full Suspension for my self.
I'd been looking at frames with a view to swapping all the bits over from my Fury and doing it on the cheap, I'd looked at Giant Trance frames and had missed out on a couple of bargains. I eventually ended up with a Nukeproof Mega TR - 130mm travel trail version of the long travel Mega AM and a nearly new set of 140mm travel Fox forks.
So the plan of swapping all the bits of the Fury kind of went out the window....... As it was such a good frame I decided to put some decent bits on it and build it to a good spec.
So after a few months of sourcing bits and a couple of weeks building I ended up with this:

It's an awesome bike, and is way more capable than I am. Hoping to get it over the Peaks and eventually ride Snowdon on it.
Thanks for reading - I'll do some more indepth posts on each of the bikes.
So, my bikes then........
I suppose I should put up a picture of my first mountain bike - although it's probably closer to a BSO (Bicycle Shaped Object) than an MTB.
This was a Saracen Element 2 that I purchased in 2009 and was in fact the first bike I'd had since my Raleigh Super Burner BMX when I was 11......
Getting 'back on a bike' came about due to a running related knee/calf injury I picked up on New Years Eve 2008. I had intensive physio and was told not to run - but cycling would be OK. So I went and got a bike. I got the Saracen based on my previous experience of them (which was back in the early 90's when I worked at Halfords as apart time bike sales assistant/repair butcher...) and I had a thing for the Saracen Tuff Trax Elite which was a £500 bike at the time and had Shimano Deore LX kit - sexy!!
So fast forward 20 year and I walk into a shop see the Saracen and go into Andy Pipkin mode - I pointed and said 'I want that one....'
It was a beast (OK, not quite....) it had the following awesome spec:
*SR Suntour XCT-V2 suspension forks with 75mm travel
*Lightweight & profiled 7005 T6 aluminium frame
*Shimano Altus 24 speed gear system with trigger shifters
*XC-D double wall alloy rims with alloy quick release hubs
*SR Suntour alloy chainset fitted to a sealed cartridge B/B
But it did one thing - got me back out exercising and back on a bike for the first time in over 20 years! I stuck with the riding until my injury was sorted and then it went back in the garage and I went running again! It came out a few other times later that year for a ride round some lanes with a mate.
Then fate threw the worlds worst (well from my point of view anyway....) kidney infection at me early 2010 (which may or may not have been linked to running around Dubai for 5 Months of an evening training for the London Marathon where they spray 'untreated water' on to the grass of an evening....). Suffice to say I didn't do the London Marathon in 2010, as I spent 2 months on antibiotics feeling quite rubbish. So how does this relate to MTB's? - well, i also used to dive a lot at the time, which I also couldn't do with dodgy kidneys, and my instructor was a keen Mountain Biker at the time too - so he suggested that I join him for a ride over Cannock Chase one morning for a lap of Follow The Dog. I have to say it was the most fun I'd had on a bike since I was 12 jumping of the school steps or riding the local BMX track.
Anyway, I didn't get much riding over The Chase after that due to the arrival of our Daughter late 2010 and a house move in late 2011 - to Cannock......
Cannock Chase is awesome - not just for riding, but for general outdoorsy stuff! - but don't just hang around the visitors centre at Marquis Drive (like 90% of the population of Cannock) - there's way more to explore and enjoy!
It wasn't until early 2014 that I dug the bike out again and started riding as it was about this time my Daughter started riding a bike and my Son got his confidence back.
It started as a ride around the visitor centre paths and then I'd go off and explore a bit while the kids hit the playground, I'd also do a couple of little rides locally on Shoal Hill Common.
I also joined a local group called Chase Riders and tagged along on one of there evening rides. This is when I realised that I liked MTB - a lot! And I also realised after a couple of rides with these guys that my Saracen just didn't cut it.
I wasn't sure if I could upgrade the Saracen or get a new bike, so I started doing a bit of research and after reading a couple of reviews and consulting a few forums I settled on a new bike instead of upgrading the Saracen as it would work out cheaper.
So I ended up with a Carrera Fury - this was the 26" wheel 2012 model and was being phased out to be replace with the new 650b wheel version. So with some British Cycling discount, online discount code and some cash-back I got it for around half price - bargain!
This was a major step up from the Saracen as it had 120mm travel air forks, trendy 2x10 SRAM gearing and hydraulic disk brakes.

This bike was head and shoulders above the Saracen and was more confidence inspiring. It's been all over the Chase, The Peak District, Long Mynd and the Wrekin - and has handled them all brilliantly.
I've made a few upgrades over time - which I'll cover in another post about each of the bikes.
So the Fury has served me well for over 2 years, but I found myself wanting a bit more travel and a bit of rear suspension.
Last year I built my Son a new bike instead of buying something from the shop as I could build a better spec for less with decent used parts (will also do a post on this at some point!). I quite enjoyed doing the build and decided to have a go at building a Full Suspension for my self.
I'd been looking at frames with a view to swapping all the bits over from my Fury and doing it on the cheap, I'd looked at Giant Trance frames and had missed out on a couple of bargains. I eventually ended up with a Nukeproof Mega TR - 130mm travel trail version of the long travel Mega AM and a nearly new set of 140mm travel Fox forks.
So the plan of swapping all the bits of the Fury kind of went out the window....... As it was such a good frame I decided to put some decent bits on it and build it to a good spec.
So after a few months of sourcing bits and a couple of weeks building I ended up with this:

It's an awesome bike, and is way more capable than I am. Hoping to get it over the Peaks and eventually ride Snowdon on it.
Thanks for reading - I'll do some more indepth posts on each of the bikes.
Wednesday, 7 September 2016
Ooh look - a sparkly new blog!
I have no idea why I've decided to start a blog - perhaps it's an age thing. Kind of like an interweb midlife crisis and let's face it - cheaper than a sports car!
So what's it all going to be about then?
Well it'll just be a collection of my mutterings and thoughts about things - but mainly my bikes and MTB in general.
So sit back, relax and wait while I think of something you'll want to read!!
Subscribe to:
Posts (Atom)