So, night riding then - you either like it or hate it, well most likely hate the faff that goes with it 'cos lets face it a ride is a ride!.
The thing is, riding a trail in the dark gives it a completely different look and feel. That nice wide dead flat trail during the day is now a shadow strewn narrow strip of light bordered by the inky black of night - and what was that in your peripheral vision?? a deer? a werewolf? a fox? or the black eyed girl and Pig Man of Cannock Chase out for a moonlight stroll??? either way it's a different experience.
When I first started night riding I stuck to the nice wide non technical blue route around Cannock Chase and even that took on a whole new atmosphere. There's a section going through the woods at the bottom of Abraham's Valley that always feels just that little bit more closed in with a feeling of being watched.
Even the most boring trail in daylight can be transformed into making you feel like you're piloting the Millennium Falcon at light speed with the windows down! such is the effects of the tunnel vison that can be experienced depending on the lights you have.
When I first started I had single spot light on my bars and a small torch on my helmet - because both of these had a 'spot' beam the cut off from the beam angle was very tight - giving the impression of riding down a very narrow tunnel of light. I tried riding solo once with this set up and ended up ditching the ride after around half a mile as it made me feel sick. If you're in a group of people its not too bad as other parts of the trail are illuminated and it removes the tunnel effect.
My lights are from Amazon and are the Chinese CREE type (similar to THESE) that promise an output of 1200 lumens (they won't - they'll do around 600 - 900 lumens depending on battery type and how good the cooling is and how good the glass in front of it is). These tend to have quite a narrow beam, so to overcome this you can get a diffuser to replace the plain glass at the front. This gives a bit more control to the light and gives it a wider spread - downside is the output drops off a bit due to the light bouncing around a bit to get the right beam pattern.
These are dead easy to fit and it takes about 5 minutes. Below is a before & after shot of the beam patterns.

(Picture taken from C & B Seen Website)
As you can see it takes away the bright centre and gives a more even light level and wider distribution - this now gets rid of a lot of the tunnel effect as the edge of the trail is better illuminated.
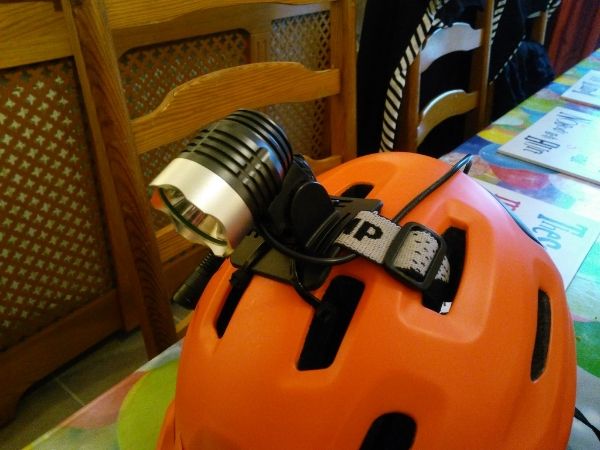
I only changed the diffuser on my bar mounted light and left the helmet as spot - this helps to pick out and highlight features ahead of you on the trail where you're looking.
So it's only recently that I've started riding the more technical single track routes at night - this is night riding on a whole new level for me - great fun!.
To compensate for this I've put my other CREE lamp onto my helmet - I've kept this as the spot light though without the diffuser. Getting the light to stay in one position involved a bit of engineering know-how (i.e. cable ties, grip tape and rubber matting....). But once they're sorted it makes a massive difference to have a higher output lamp on your noggin'.
As before the trails take on a different air - what appeared to be small drop offs in daylight look a lot more ominous by torch light. You have to be a bit more careful with the lines you choose as it's hard to judge rock heights, rut depths and what ever else is lurking in the shadows. It's also good for getting you to look further down the trail. If you look just in front of your bike that's where all the light is concentrated and you end up just barrelling into the dark unknown.
Setting your lights to the perfect angle can be time consuming making sure that you aim the spot far enough in front at the right angle to keep your head level. You also have to remember that where you look is where the light will be.
I've also upgraded/replaced the original battery packs that came with the lights. I did this for 2 reasons:
- They weren't holding a charge very well
- I'd seen some posts about them exploding/catching fire as not all of them have built in protection circuits to prevent over charging - I used to charge mine at work so they weren't left unsupervised.
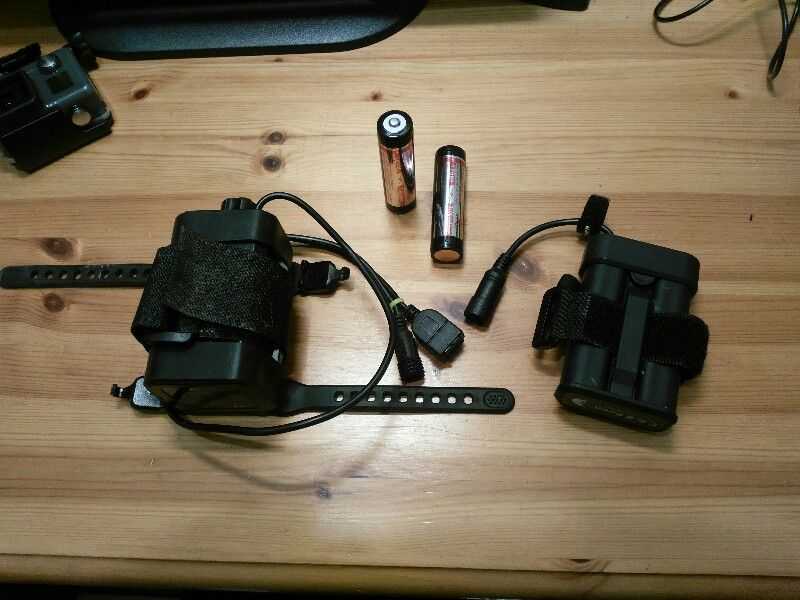
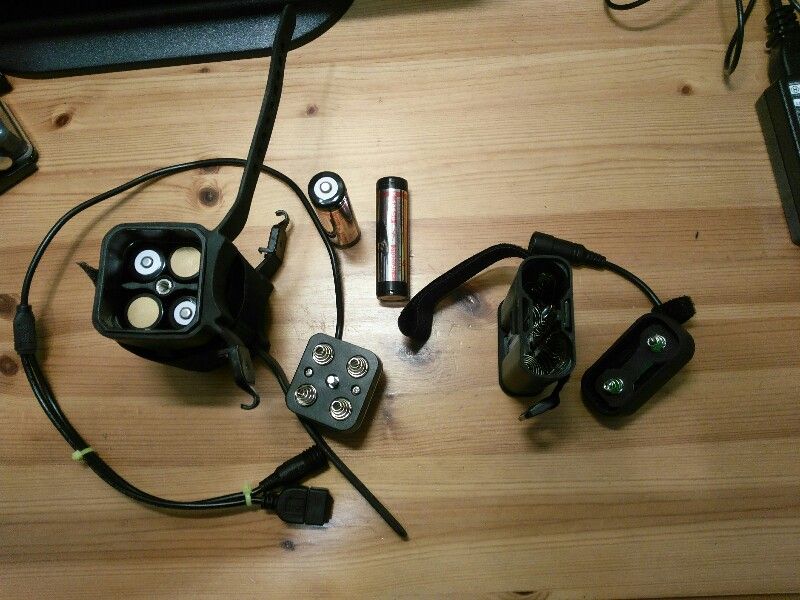
I picked the 2 cells and holder up from C & B Seen (incidentally I also got my diffuser lenses from them previously), the 4 cells from Amazon and the holder from GearBest. The 4 cell holder also has a USB output so you can charge your phone or Garmin if needed too.
The 2 cell holder has the two 3.7V 3100mAh batteries in parallel to give a the required 7.4V output and keeps the capacity to 3100mAh - so should be good for 2.5 hours on full.
The 4 cell holder uses a series/parallel arrangement of 4 2600mAh cells to give the 7.4V output but doubles the capacity to 5200mAh, which apparently is good for around 3.5 hours on full.
I will, at some point do a proper burn-time test on the lights and batteries.
So with decent batteries and sturdy mounts it's all go!
knowing that your lights are going to last for at least a good couple of hours on max and longer on low setting is nice and comforting,
It's easy to switch between hi/low settings (even with the helmet mounted light) and I use the low settings for fire roads and roads and switch to hi for the twisty technical stuff, this seems to work OK and will also make the batteries last longer as you aren't running them flat out all the time.
You can also see a surprising amount of wildlife at night too. I've encountered bats, owls, deer - both singular and in a herd and the ever present 'trail mouse' which always seems to appear when you're lent over going through a corner with little room to avoid the damn thing*!
My first night ride of 2017 culminated in me sharing the final climb back to the car with a herd of deer - it was a privilege to just stop where I was and watch them as they went about there business, they didn't seem too phased by it at all.
Other things to consider are clothing choices - it's better to get layered up in the winter months base layer under jersey, fleece/waterproof over the top and leggings under your shorts; oh and get some warm socks - it's not fun when you can't feel your toes 10 minutes in to the ride...
Getting back into night riding - even with all the 'faff' has given me a renewed enthusiasm for riding again.
So what are you waiting for? Get some lights and get riding!
*No trail mice were injured in the writing of this blog - the rider, however, has narrowly avoided several 'offs' avoiding said rodent.....
No comments:
Post a Comment